

In the high-octane world of motorsports, safety is paramount. One vital component that enhances safety is the kill switch. This simple but effective device is designed to immediately cut off the engine in the event of an emergency, providing essential protection to drivers and spectators alike. Understanding how to wire a kill switch properly is crucial for any racing enthusiast looking to enhance their vehicle’s safety features.
The kill switch not only serves as a safety measure but also allows for quick action in dangerous situations. By interrupting the electrical circuit, it ensures the engine stops running, preventing potential fires or further accidents. This article will guide you through the essential steps and components required for wiring a kill switch effectively, ensuring that your racing experience is as safe as possible.
From selecting the right switch to understanding the wiring process, we will cover every aspect necessary for a successful installation. Whether you are a seasoned racer or a beginner, proper knowledge and execution of wiring a kill switch can make a significant difference in your overall safety on the track. Let’s dive into the detailed process of integrating this crucial feature into your racing setup.
Choosing the Right Kill Switch for Your Racing Setup
Selecting the appropriate kill switch is crucial for ensuring safety during racing activities. The right switch should be reliable, easily accessible, and suitable for your specific racing conditions.
First, consider the type of kill switch. There are two main categories: momentary and maintained. Momentary switches require you to hold the button to keep the circuit closed, while maintained switches latch in place until manually reset. For racing purposes, a maintained switch is typically preferred due to its simplicity in emergencies.
Next, focus on the current rating of the kill switch. It must be able to handle the maximum amperage produced by your vehicle’s electrical system. Selecting a switch with a higher rating than your system’s requirements ensures safety and longevity, preventing potential failure during a race.
The wiring setup is also an important factor. Ensure that the wiring from the kill switch to the vehicle’s electrical components is robust and properly insulated. Using high-quality connectors and terminals can prevent electrical and mechanical failures, which are critical during high-stress racing situations.
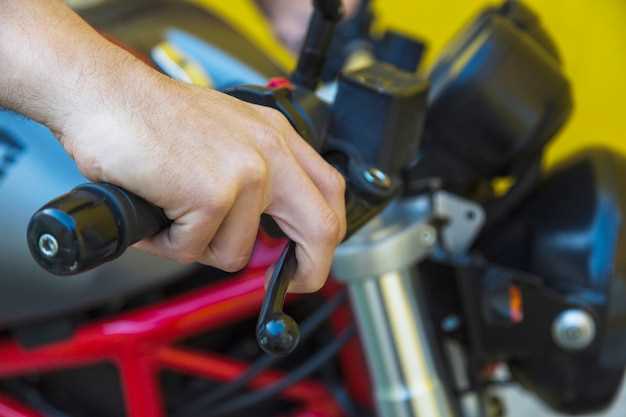
Additionally, placement is key. The kill switch should be mounted in a location that is easily reachable by the driver and any pit crew members. This accessibility allows for a prompt response in emergency scenarios, making it vital for quick shutdowns.
Lastly, look for features such as dust and moisture resistance, especially if you participate in off-road races or events where conditions can be harsh. A switch that can withstand these challenges will enhance your reliability and peace of mind during competitions.
Step-by-Step Wiring Process for a Kill Switch

To ensure maximum safety during racing, properly wiring a kill switch is essential. Follow these steps to wire your kill switch effectively.
Step 1: Gather Materials
You will need a kill switch, electrical wire, connectors, crimping tool, wire stripper, and a multimeter. Ensure the kill switch is rated for the intended voltage and current in your racing vehicle.
Step 2: Disconnect the Battery
Before starting any wiring, disconnect the vehicle’s battery to prevent accidental short-circuits or shocks during the installation process.
Step 3: Identify Wires
Locate the ignition wire, usually found near the ignition coil or starter. Use a multimeter to verify which wire provides power when the ignition is on.
Step 4: Cut the Ignition Wire
Once you have identified the ignition wire, cut it at a convenient length to make connections to the kill switch. Make sure to leave enough length for wiring adjustments if needed.
Step 5: Strip Wires
Using a wire stripper, strip about half an inch of insulation from both ends of the cut ignition wire. This will create a clean connection point for the kill switch.
Step 6: Connect the Wires to the Kill Switch
Using the manufacturer’s instructions, connect one end of the ignition wire to the input terminal of the kill switch. Connect another wire from the output terminal of the switch back to the ignition system. Ensure solid connections by using connectors and crimping them securely.
Step 7: Secure the Kill Switch
Mount the kill switch in a location that is easily accessible during racing. Make sure it is secured properly to avoid movement or disconnection while driving.
Step 8: Reconnect the Battery
After all connections are made and secure, reconnect the battery. This will allow you to test the functionality of the kill switch.
Step 9: Test the Kill Switch
Start the vehicle to check if the ignition activates normally. Turn the kill switch to the ‘off’ position to ensure it cuts off the engine completely. Repeat the process to confirm reliability.
Step 10: Final Check
Make a final inspection of all wiring to ensure there are no exposed wires or loose connections. Proper insulation and securing of wires are crucial for safe operation.
By following these steps, you will have successfully wired a kill switch, enhancing the safety of your racing vehicle.
Testing and Troubleshooting Your Kill Switch Installation
Once you have installed the kill switch, it is crucial to conduct thorough testing to ensure that it operates correctly. Start by checking all connections, making sure that wires are securely attached and that there are no exposed wires that could cause short circuits. Use a multimeter to check the continuity of the circuit when the kill switch is in both the ‘on’ and ‘off’ positions.
To test the kill switch functionality, turn on your vehicle and activate the switch to the ‘off’ position. The engine should shut down immediately if the installation is correct. If the engine continues to run, there may be an issue with the wiring or the switch itself. In such cases, double-check the wiring diagram and confirm that the switch is properly rated for your vehicle’s electrical system.
If the kill switch does not function as expected, inspect for potential grounding issues. A poor ground connection can lead to erratic performance or complete failure of the switch. Ensure that the ground cable is securely connected to both the battery and the frame of the vehicle.
After addressing any issues, re-test the kill switch under different scenarios. For instance, simulate a race start and activate the switch to ensure it can handle abrupt conditions without malfunctioning. It’s also wise to enlist a friend to assist during testing; one person can focus on the kill switch while the other monitors engine behavior.
If persistent problems occur, consider replacing the kill switch with a new unit, as it may be defective. Always refer to the manufacturer’s guidelines for troubleshooting specific issues related to the kill switch model you are using. Regular maintenance checks will ensure reliability when it matters most during a race.