

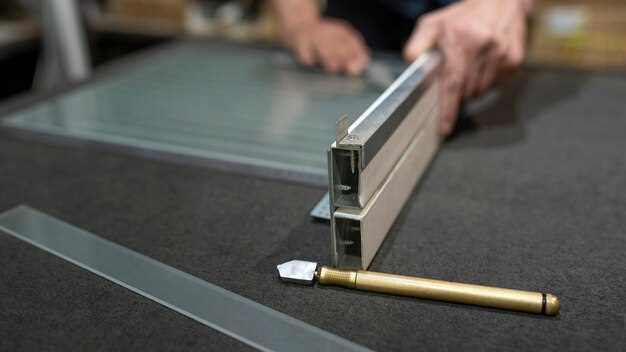
When it comes to safeguarding your motorcycle, frame sliders are an essential upgrade that can significantly reduce damage during a fall or crash. These protective devices are designed to absorb impact and prevent the frame of your bike from contacting the ground, which can lead to costly repairs. Understanding how to properly install frame sliders is crucial for any rider looking to enhance the longevity and safety of their machine.
In this guide, we will walk you through the process of choosing the right frame sliders for your specific model, along with detailed instructions on how to install them effectively. Whether you are a seasoned rider or a beginner, this step-by-step approach will ensure you feel confident in adding an important layer of protection to your bike. Prepare to equip your motorcycle with the resilience it needs to face the unexpected challenges of the road.
By taking the time to install frame sliders, you’re not just protecting your investment; you’re also enhancing your riding experience. With the right knowledge and tools at hand, you can perform this installation yourself, making it a worthwhile addition to your bike maintenance routine. Let’s dive into the specifics of selecting and installing these vital protective components.
Choosing the Right Frame Sliders for Your Bike Model
Selecting the appropriate frame sliders is crucial for ensuring the safety of your bike. Frame sliders serve as a protective measure in the event of a fall or crash, minimizing damage to the bike’s fairing and engine components. To find the right sliders, consider factors such as compatibility with your specific bike model, material strength, and design features.
Compatibility is the primary consideration when choosing frame sliders. Each bike model has unique mounting points, so it’s essential to purchase sliders specifically designed for your make and model. This guarantees a proper fit and optimal protection. Check the manufacturer’s specifications or consult with an expert if you’re unsure.
Material choice affects the effectiveness and durability of the sliders. Look for high-quality materials like nylon, delrin, or aluminum, known for their strength and resilience. These materials can absorb impact without cracking or breaking, providing better protection in case of an accident.
Additionally, consider the design of the frame sliders. Some designs offer a low profile, while others may extend further out, providing more coverage but potentially affecting ground clearance. Select a style that aligns with your riding preferences and the type of riding you do, whether it’s street riding or track racing.
Finally, reading reviews and seeking recommendations from fellow riders can provide insights into the performance and reliability of different frame sliders. Assessing feedback can help you make an informed decision that prioritizes both safety and functionality.
Step-by-Step Installation Process for Frame Sliders
Installing frame sliders on your motorcycle can significantly reduce damage during a fall. Follow these detailed steps to ensure proper installation.
Step 1: Gather Necessary Tools
Before you start, make sure you have all the necessary tools. You will typically need a socket set, torque wrench, screwdrivers, and possibly a few other tools depending on your bike model.
Step 2: Prepare Your Motorcycle
Ensure your motorcycle is on a stable surface and in gear or with the rear wheel elevated. This will prevent any movement during the installation process.
Step 3: Identify Mounting Points
Locate the specific areas where the frame sliders will be installed. Usually, these are situated near the engine mounts or frame junctions. Refer to your motorcycle’s manual for precise locations.
Step 4: Remove Existing Components
In some cases, you may need to remove fairings or other components to access the mounting points. Carefully detach these parts, keeping track of all screws and fasteners for reassembly.
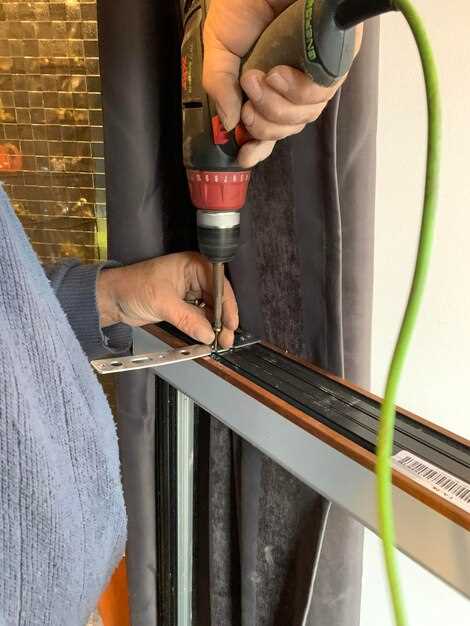
Step 5: Install Frame Sliders
Align the frame sliders with the designated mounting points. Insert the bolts through the sliders into the frame, ensuring they fit snugly. Be careful not to cross-thread the bolts. Tighten them according to the manufacturer’s specifications, using a torque wrench if available.
Step 6: Reassemble Any Removed Components
Once the sliders are secured properly, reattach any fairings or components that were taken off. Make sure everything is aligned correctly, and all screws are tightened.
Step 7: Final Inspection
After installation is complete, perform a thorough inspection to ensure the frame sliders are secure. Check the tightness of the bolts and confirm that no components are loose. It’s also wise to take a short test ride to verify stability.
Step 8: Regular Maintenance Checks
Periodically check the frame sliders as part of your motorcycle maintenance routine. Ensure they remain secure and free from damage, replacing them if necessary after any incidents.
Maintaining Frame Sliders to Ensure Maximum Protection
Regular maintenance of frame sliders is crucial for ensuring the safety of your bike during a fall or slide. These components are designed to absorb impact and protect your bike’s frame from damage, but they can lose their effectiveness if not properly cared for. Start by inspecting the sliders for any signs of wear or degradation. Look for cracks, chips, or deformities in the material that could compromise their structural integrity.
It’s important to clean the frame sliders periodically. Use a soft cloth and mild soap to remove dirt and debris that may accumulate over time. Avoid harsh chemicals that could damage the materials. After cleaning, ensure that the mounting hardware is secure and free of rust or corrosion, as loose or damaged fasteners can lead to failure in critical situations.
Check for alignment regularly. Misalignment can occur due to impacts or improper installation. Proper alignment ensures that the sliders will function as intended during an incident. If necessary, adjust the position so they are correctly aligned with the bike’s frame. This will enhance their ability to absorb impact and prevent damage effectively.
Consider replacing your frame sliders if they show significant wear from use or if they have been involved in a crash. Their protective capabilities may diminish over time, so replacing them with new sliders can provide peace of mind and increased safety. Opt for high-quality replacements that are specifically designed for your bike model for best results.
By taking these steps, you can ensure that your frame sliders provide maximum protection, keeping your bike safe and extending its lifespan. Regular checks and upkeep are essential for maintaining the functionality of these important components.